Friday, December 27, 2013

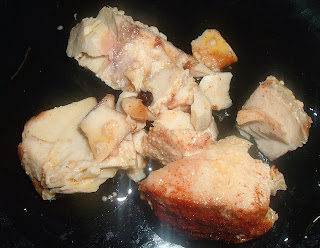
ROASTED RABBIT

A different meat today. Rabbit. I know. I know. Some of you will find this meat dish a bit discouraging. But it is a delicious meat. It does not have much fat. And you can cook it in many ways. Let’s try something different. And do not be afraid. It is good.

Ingredients:

1 rabbit
3 tablespoons extra virgin olive oil
1 teaspoon red wine vinegar
2 cloves of garlic, chopped
1 teaspoon Spanish pimentón
Some salt to taste
Some freshly ground black pepper to taste
1 teaspoon dried thyme
1 teaspoon dried rosemary
1 teaspoon dried parsley
1 teaspoon dried oregano

The first step is preparing the rabbit. If it is not clean, clean and wash the rabbit well. Nowadays if you can buy rabbit meat, it is already clean. So you do not have any excuses.
Then mix the rest of the ingredients. Mix the herbs with the extra virgin olive oil and the vinegar. Rub this on the rabbit and let it marinade, covered, for one hour at least in the fridge.
Take it out from the fridge and let it go to room temperature. Put the rabbit in a preheated oven to 350ºF. Roast it for about one hour. But it is important that the meat is well done. Rare rabbit is not good. So make sure the rabbit is well done. If you see that the meat is getting dry, you can rub it with a mixture of oil and water.
And then your rabbit will be ready. You can serve it with a salad. Roasted potatoes are also a good side for the rabbit.
Do not be afraid of cooking rabbit. If you give rabbit a chance, you will be happy with it. Lean meat, and very delicious with the herbs. Enjoy!

Wednesday, December 25, 2013

POTATO SALAD

Today Potato Salad. One of my favourite salads. It is a classic in the United States. I just love it. There are many variations. All of them delicious. Let’s make one.

Ingredients:

3 potatoes
1 stalk of celery
1 clove of garlic
1 shallot (you can also use regular onions)
Some salt to taste
Some freshly ground black pepper to taste
2 tablespoons mayonnaise sauce
1 teaspoon mustard

First we will prepare the potatoes. Depending on the kind of potatoes you use, you can leave the skin on or not. Use your favourite kind of potatoes. When the skin is not too thick I usually leave the skin on. Cut the potatoes in pieces, not too small pieces. Boil the potatoes in water with a bit of salt. Make sure the potatoes are not overcooked. But you do not want them to be under-cooked either. The time you have to be cooking them will depend on the kind of potatoes you are using. When they are ready, remove them from the water and reserve.
While the potatoes are being boiled, you can prepare the rest of the ingredients. Chop the shallot, the celery and the garlic. It is a good idea to add the leaves of the celery.
When the potatoes are cool, add the vegetables. Then add salt and pepper to taste. You can also add some herbs. The ones you prefer. You can add some dill, thyme, rosemary…
Then add the mayonnaise sauce and the mustard. Mix well. Do not add too much mayonnaise sauce. At least I prefer it like that.
Once you have it prepared, cover it and store in in the fridge. Refrigerate it for two hours at least. Then, it will be ready to serve.
It is healthy. It is the perfect side. The perfect salad. Enjoy!

Wednesday, November 27, 2013

HUEVOS RELLENOS

Deviled Eggs! So many memories from my childhood! Very common in many countries. Lots of ways of making them. But always with a common ingredient, of course. Hard boiled eggs. Let’s make some Deviled Eggs!

Ingredients:

5 eggs
1 3-ounce tuna can
1 teaspoon Sriracha Hot Chili Sauce
1 tablespoon mayonnaise
10 teaspoons mayonnaise
Some salt to taste
Some freshly ground black pepper to taste
Some roasted red pepper

The first thing will be boiling the eggs. Put the eggs in a pan and fill with water. Heat it and bring it to a boil. Cook for about ten minutes. Let them cool. When they are cold, remove the shells from the eggs. Cut the eggs in half lengthwise. Remove the egg yolks and put them in a bowl or container, but reserving two yolks. Blend and mix the yolks a little. Remove all the liquid from the tuna can. Then add it to the bowl. Mix well. Now you can add one tablespoon of mayonnaise and the Sriracha Hot Chili Sauce. Mix well again. Add some black pepper and salt to taste.
When everything is well mixed, you can start filling the eggs. Once they are filled, cover them with the rest of the mayonnaise sauce. Then take the two yolks that we reserved and grate them over the eggs.
The last thing will be cutting the roasted red peppers in strips and decorating the eggs. Put two strips making a cross on top of every egg. That will make them even more delicious.
Put them in the fridge for at least two hours. They will be ready then. Perfect as sides, for parties… And of course, remember that you can give your touch to your Deviled Eggs. Use your imagination. Enjoy!

Sunday, November 24, 2013

MEAT STUFFED EGGPLANTS

Eggplants, aubergines… A very good vegetable for today. And stuffed with meat. Delicious. There are many variations for this dish. You can stuff them with your favourite ingredients. Let’s cook.

Ingredients:

1 eggplant
Some extra virgin olive oil
½ chopped onion
½ chopped green pepper
1 clove of garlic, chopped
½ pound ground beef
1 teaspoon dried thyme
1 teaspoon dried rosemary
1 teaspoon dried parsley
Some salt to taste
Some freshly ground black pepper to taste
Some shredded cheese

First cut the eggplant in two. Rub them with a bit of olive oil, add a bit of salt and take them to the oven on a tray. Bake them for about 30 minutes at 350ºF. Reserve. Then prepare the other vegetables. Chop onion and peppers. The garlic too. Heat some oil in a pan and when it is hot, sauté the onion and peppers. A couple of minutes later add the garlic. Go on cooking for one minute and then add the ground beef. Add the herbs.
Take the eggplants and scrape some pulp out of them. Chop that and add it to the pan.
When the meat is starting to get brown, turn the fire off. Mix well and then stuff the eggplant halves with the pan contents. Add some salt and black pepper to taste.
Take them to an oven tray and put some shredded cheese on the eggplant halves. Take the tray to the preheated oven to 350ºF. Let them cook till the cheese melts.
And then you will have them ready. Ready to eat. Ready to taste them. Enjoy!

Wednesday, October 30, 2013

JAMAICAN CURRIED GOAT

Curried Goat! A Jamaican classic. I will cook my version today. For the ones that like goat. And talking about Jamaica, of course, it will always be tasty. Let’s start cooking.

Ingredients:

½ chopped onion
2 chopped green onions
2 cloves of chopped garlic
1 tablespoon chopped fresh ginger
2 tablespoons Jamaican Curry Powder
Some salt to taste
Some freshly ground black pepper
½ teaspoon thyme
1 tablespoon extra virgin olive oil, divided in two
2 pounds goat meat
2 potatoes
1 big carrot
Some water
Some cooked rice to serve

First thing we will prepare the vegetables for the marinade. Next, put the onions, the garlic, the ginger, the curry powder, half the oil and the thyme in a blender. Work on it and add a little water if is needed to get it blended. The next step will be to prepare the meat. Cut it in pieces if the butcher has not done it yet. Pieces with bones are perfect for this curry. Then put the meat in a plastic container and mix it with the marinade from the blender. Let it marinate for some hours in the fridge. If you can, it is better marinating overnight.
Once the meat is ready, go on with the vegetables. This time, the carrots and the potatoes. Peel them and cut them in pieces not too big.
Now we will start cooking in our wok. Heat the rest of the oil in the wok, just to grease it lightly. Try to remove the marinade from the goat but keep it. When the oil is hot, put the goat without the marinade in it and seal the meat. Cook it for a couple of minutes. Then add the potatoes and the carrots. Add the marinade and cover with water. Bring to a boil and then set the fire to simmer. Cook it for… long. One, two hours. It depends on the meat. But make sure it is simmering at low temperature.
When the meat is done, the curry is done. You can serve it with some cooked rice. A wonderful Jamaican curry. Enjoy!

Tuesday, October 29, 2013

MARLIN PRESERVE

Let’s make a fish preserve. We will use marlin today. But you can do it with tuna. And with bonito, if you can find it. Marlin will do. Let’s make it.

Ingredients:

12 black peppercorns
12 ounce marlin
Some extra virgin olive oil
Some salt
Some red wine vinegar (optional)

First a warning. To make preserves it is very important to sterilize the jars and all the tools you will be using. Otherwise it could be even dangerous for your health. So make sure you boil the jars and the tools properly before using them to make the preserve. Wash your hands properly but, anyway, do not touch the jars with them. Use a pair of tongs to handle them.
This is a recipe for preserving marlin. Of course it will be good for other kind of fish. Tuna, bonito or similar fish will be also good. In fact, tuna and bonito preserves are really traditional in my country. And almost everywhere.
Once you have sterilized everything well, you can start with the preserving. First put the peppercorns in the glass jars. Next thing, prepare and clean the fish. Remove skin and bones. The marlin must be neat.
Try to cut the marlin in pieces that will fit the jars. If you can get a piece that will fit a jar, the better. That is better that putting several pieces of marlin in a jar.
Put a good piece of marlin in every jar. Fill the jars with olive oil seasoned with a bit of salt. You can add some vinegar if you want. I like it with vinegar but it is up to you. Besides, if you use some vinegar, the preserve will be safer. Fill the jars to the rim, making sure you do not leave any air inside the jar. Then close the jars with their lids.
Put the jars in a big pan and cover with water. Make sure the water covers the jars and then add more water. We want the jars to be covered by water through the whole process. Now you will have to sure you boil the jars for at least one hour.
Let the jars cool. You are not in a hurry to remove the jars from the water.
When they are cold enough, remove from the water and let them cool completely before storing them in a dark and dry place. That is if you are not tempted already to try them. You can, you should, store them for one month at least. The taste will be better then.
You can serve it as a side. It is also good as an ingredient for a salad. It is really good. Once you are comfortable making preserves, you will find it very rewarding. I have to admit that the preserves are so good that they do not last too long in my pantry. I should be more patient. It does not matter. Whenever you eat it, enjoy it!

Sunday, September 22, 2013

PASTEL DE CHOCLO

A recipe from Chile. I love it. Pastel de Choclo is, in fact, a corn and meat sort of pie. Sweet or savory? Some people make it sweet, others savory. I will ad salt and a bit of sugar. Let’s cook.

Ingredients:

For the choclo:

¾ cup corn
2 tablespoons milk
1 teaspoon salt
1 teaspoon sugar
½ teaspoon freshly ground black pepper
1 teaspoon basil

For the meat:

1 little onion, chopped
2 cloves of garlic, chopped
½ chicken breast, cut into little strips
½ pound ground beef
Some extra virgin olive oil
Some salt to taste
Some freshly ground black pepper
½ teaspoon cumin
½ teaspoon oregano

For the cake:

2 boiled eggs, sliced
Some black olives, pitted and sliced
Some raisins
Some breadcrumbs
A pinch of sugar (optional)

First, prepare the corn. To do it, put it in a blender or food processor. We can add some milk to make it easier. It will be creamy too. You have to get a sort of corn dough, not too liquid. When you have it, add the salt, the sugar, the black pepper and the basil. Then put in a pan and cook it for about five minutes stirring continuously. Reserve.
The next thing will be preparing the meat for our pastel. Start frying the chicken strips using just a bit of hot oil. Remove the chicken from the pan in three minutes and reserve.
Go on sautéing the onion in the pan. Five minutes later add the garlic and the ground beef. Add the cumin and the oregano, and salt and pepper to taste. Cook till the meat starts losing its red colour.
And then, start finishing the pastel. Grease an oven mold lightly and put the cooked meat with the onion first. On top that put the chicken. The next layer will be the boiled egg in slices, the olives and the raisins. Finally, the corn we have cooked before. The last thing will be adding some breadcrumbs and, if you want, this is optional, a bit of sugar.
Then take it to the oven, preheated to 350ºF. Bake it for about 15 minutes. Let it cool a bit before serving.
And then you will have your Pastel de Choclo ready. If you want it to be a bit lighter, you can omit the chicken.
You will really like this pastel. It is delicious and rewarding. Ready to eat, now. Enjoy!

Saturday, September 21, 2013

HARIRA

Today we will travel to the North of Africa. Harira is a delicious soup/stew, similar in a way to the Spanish Cocido but in fact, closer to a soup than to a stew. It should be cooked with lamb but you can use beef if you want. It can also be made without meat. The results are also delicious. This recipe is for a pressure cooker. An easy and convenient way to cook it. And good. Try. You’ll see.

Ingredients:

1 cup chickpeas
½ cup lentils
½ chopped onion
1 chopped carrot
½ cup chopped celery
1 clove of garlic, chopped
½ pound lamb, cut in not very small pieces
Some extra virgin olive oil
8 oz crushed tomatoes
1 tablespoon parsley
1 tablespoon cilantro
Some salt and freshly ground black pepper, to taste
½ teaspoon turmeric
½ teaspoon powdered ginger
A pinch of powdered cinnamon
A pinch of saffron
Some flour
1 egg, beaten
Some fine pasta, like fideo or vermicelli

The first thing to do is soaking chickpeas and lentils on water overnight.
The next day put some oil in the pressure cooker. When it is hot, add the lamb and sear it for about three minutes. Then add the vegetables, cut and prepared previously (onion, carrot, celery and garlic). Add the chickpeas and lentils to the cooker too. Add the crushed tomatoes but reserve one tablespoon more or less. Then add the parsley, the cilantro, the spices and the saffron. Add some salt and pepper to taste. Let it cook for about two minutes and then cover everything with water. Close the pressure cooker and follow the instructions for your cooker. With my cooker, I wait till it starts steeming and then I have it cooking for 20 minutes at a lower fire.
In the meantime, mix half a cup of hot water with a tablespoon of flour and the tablespoon of crushed tomatoes we had reserved.
When you can open the cooker, add the vermicelli, the mixture with the flour and the beaten egg. Go on cooking at a low fire. The Harira will be finished while the pasta is being cooked.
And then it will be ready. A wonderful dish. Harira. Serve hot. Enjoy!

Sunday, August 11, 2013

BARBECUE PORK SANDWICH

Today a wonderful sandwich. We can use loin or tenderloin pork. Pork and barbecue sauce. The perfect combination. Let’s cook.

Ingredients:

1 pound pork loin or pork sirloin
Some salt and freshly ground black pepper
Some extra virgin olive oil
Some barbecue sauce

First, you will have to prepare the meat. Put some salt and pepper to it and if the meat is too big, you can cut it in two pieces. This time, I cooked the meat in a pressure cooker. But first put a couple of teaspoons of olive oil in the cooker and heat it. Put the pork inside and sear the meat for about 5 minutes. Then cover the meat with water and close the pressure cooker. Follow the instructions of your pressure cooker. What I do is setting the fire to high first and when the cooker starts to release steam, I set it to low and then I start counting the time. In this case, we should have the meat in the cooker for about half an hour, counting from the moment it starts to release steam. After that, turn the cooker off and let it cool before you open it.
Next, when it is safe to handle the pork, shred it finely. Once it is shredded, put the meat in a not too hot pan and add the barbecue sauce little by little. The fire must be low. Keep on stirring so that all the meat gets the sauce and add more sauce if necessary till you get the results you want. You do not want to add too much sauce, believe me. If you think that it is too dry, you can add a bit of the liquid from the pressure cooker. Have the meal in the pan for about five minutes.
You only have to make the sandwiches with your favourite bread. You will really love this sandwich. You can cook the pork in a slow cooker too. The results are amazing. Enjoy!

Monday, August 5, 2013

CURRIED CHICKEN SALAD

This is a delicious salad. With an Indian touch. I love it. Let’s make it.

Ingredients:

1 tablespoon chopped shallots
1 tablespoon chopped celery
1 tablespoon blenched almonds
1 tablespoon raisins
1 tablespoon chopped apple
1 clove of garlic, chopped
1 chicken breast (boiled) or 1 10 oz can chunk chicken breast
1 teaspoon curry powder
1 or 2 tablespoons mayonnaise sauce
1 teaspoon lemon juice
Some salt and freshly ground black pepper to taste

As always, we will prepare the ingredients first. Cut the vegetables in little pieces. If you want to boil the chicken, clean it first removing all the fat you can. Then just boil it in water till the chicken is cooked. But if you use the canned food, remove the water completely. Of course, it is better to use fresh chicken, but the option of canned chicken can be helpuf when you are in a hurry.
Then mix everything except the mayonnaise sauce, the lemon juice and the salt and pepper. Once it is mixed, add the mayonnaise sauce little by little. You can always add more if you want, but if you add all of it at the beginning you may have a salad with a lot of mayonnaise. We do not want that. The last thing is adding salt and pepper to your taste. Mix well and let it cool in the fridge for a couple of hours at least.
A really good salad. A perfect side to serve with a main dish. And as it needs to be refrigerated for some time, you can make in advance and you will have it ready before hand. I think I’ll prepare it right now. Enjoy!

Saturday, July 20, 2013

WHITE BORSCHT SOUP

A different soup. From Eastern Europe. From Poland. People there love soups. Let’s try it.

Ingredients:

2 potatoes
1 egg
1 clove or garlic
1 Kielbasa sausage, sliced
8 oz prepared White Borscht
1 teaspoon oregano
½ teaspoon dill
Some salt and freshly ground black pepper to taste
Some vinegar or sour cream (optional)
Some bread

First prepare the potatoes. Peel them and cut them in pieces. Make the pieces not too big. Then, in a pan, boil the potatoes, the egg and the sausage. Remove the sausage from the water first. Remove the egg a bit later and let the potatoes cook a bit more till they are perfectly boiled. Reserve the egg, the sausage and the potatoes.
Spoon the foam and froth from the pan. Then add the prepared White Borscht. Mix well. Add the garlic, chopped. Bring to a boil. When it starts boiling, lower the fire and let it simmer, the pan partially covered. Simmer for five minutes. Then add the sausage, the potatoes and the spices. Taste it and if you feel that it needs to be a bit sourer, add a bit of vinegar or sour cream. But do not add too much at the beginning. You can always add more after having tasted it again.
Before serving, prepare the egg and the bread. Slice the boiled egg and cut the bread in pieces. Then, put pieces of bread in the bowls where you will be serving the soup. Do the same with the slices of egg. Then serve some of the soup in each bow. Add some extra dill on top.
A delicious Borscht. A delicious soup. Good. Enjoy!

Sunday, July 14, 2013

CRAB AND CREAM CHEESE WONTONS

Asian wontons. They are so good. You can get the wonton wrappers in good supermarkets or Asian stores, fresh or frozen. Let’s get started.

Ingredients:

A packet of wonton wrappers, fresh or frozen
A packet of cream cheese
1 green onion
1 can of crab meat
1 tablespoon crab paste with bean oil
Some vegetable oil

If you use frozen wonton wrappers, let them thaw in the fridge overnight. Protect them with a wet kitchen paper towel.
Chop the green onion. The cream cheese should be at room temperature. Mix the cream cheese with the crab meat and the crab paste with bean oil. Add the green onion and mix. Once you have the filling, you will have to fill the wontons.
Put a wrapper in front of you with one point towards you. Then put some filling in the middle of it. About a spoonful. Brush with water or beaten egg the rims of the wrapper. Then close the wrapper from one side to the other. Now press the wider side to the more narrow side to get two pointed parts that will have to be moved so that they get together. Repeat this with the rest of wrappers. You can also prepare the wontons in different shapes: like dumplings, like triangles... It is up to you.
You can fry them in a pan with hot oil. But you can also bake them in an oven. In this case, first brush them with oil. If you fry them, heat the oil and they fry them on every side. If you bake them, the oven must not be too hot. Bake them for over 10-15 minutes.
Once cooked, leave them on kitchen paper towel for a while.
They are wonderful. You can serve them as an appetizer with your favourite dip. Enjoy!

Saturday, June 15, 2013

TUNA SALAD

A wonderful salad. Very popular in the USA. One of those simple dishes that I love from the cooking in the USA. Simple but delicious. Let’s get started.

Ingredients:

3 5 oz cans of tuna in water, drained
A little piece of a green apple, the part with the skin
3 tablespoons chopped celery
3 tablespoons chopped onion
1 clove or garlic, chopped
Some mayonnaise sauce
Salt and pepper to taste

First open the tuna cans and drain them. With a fork “break” the tuna, but not too much. Put it in a bowl. Add the apple, diced. Add the celery, the onion and the garlic too. Mix well and add mayonnaise little by little till you get exactly the tuna salad you want. Do not add too much. Add salt and pepper to taste and then put the bowl in the fridge.
If you like it, you can add some mustard.
Serve cold. Perfect as a side. Enjoy!

Wednesday, June 12, 2013

FRIED SMELTS

Some fish for today. Smelts. Small and delicious fish. Easy to cook. And so rewarding! Let’s cook.

Ingredients:

20 smelts
1 egg
Some breadcrumbs
½ teaspoon ground garlic
½ teaspoon dry parsley
Some salt and freshly ground black pepper
Some extra virgin olive oil

I like cleaning the smelts well. You have to remove the head and the guts. Do not remove the bone of the fish. It is not that heavy and it is good for you. Anyway, you can do it if you want. Remove the tail and the fins too, if you want.
Once you have the fish cleaned, heat some oil in a pan.
Take the smelts and put them in a container with a beaten egg. Then pass them to a container with breadcrumbs mixed with garlic, pepper and parsley. And then to the pan with hot oil. The smelts do not need too much frying. A couple of minutes on both sides. Or less. Do not overcook them.
And then you will have your smelts ready. They are really delicious. Enjoy!

Friday, May 17, 2013

CHAPATIS


Indian bread. One of the delicious Indian breads. Chapatis. Let’s get started.

Ingredients:

2 cups chapati flour
½ teaspoon salt
¾ cup water

You can prepare the chapatis on a big and clean table or even on a big bowl. First thing is putting the flour in the bowl or on a table. Add the salt and water and start mixing. You have to work the dough till you get a ball of dough that does not stick to your hands. If you need it, add some extra flour.
The next step is dividing the dough in eight parts. Make eight balls with the dough. Then with the help of a rolling pin start making the chapatis.
Once you have them, heat a pan. It has to be really hot. Put one chapati in the pan and start making it. Make sure there are not bubbles in the chapati. Press the chapati with a fork to do that. Turn the chapati and cook it on the other side. Cook all the chapatis like this.
A delicious bread. Thin and tasty. Perfect to eat with any Indian food. Enjoy!

Tuesday, May 14, 2013

TANDOORI CHICKEN


We will cook some Tandoori Chicken today. Sort of. No tandoori oven. But it does not matter. We will use a regular oven. It will be good. Let’s start.

Ingredients:

1 chicken breast
1 cup plain yogurt
½ teaspoon salt
1 teaspoon lemon juice
2 tablespoons tandoori chicken spices
½ teaspoon crushed green chillies

This recipe is really easy to make. First prepare the chicken breast. Wash it and make some cuts in the meat.
The next thing is preparing the marinade. To do that, mix the yogurt with the salt, the lemon juice, the tandoori chicken spices and the crushed green chillies. If you want, you can prepare your own tandoori chicken spice. Normally, this mixture contains coriander, cumin, chilli, black pepper, cardamom, ginger, bay leaves, fenugreek, garlic, cloves, salt and oil.
Once you have the marinade, put the chicken in it, cover it and let it “work” in the fridge overnight.
The next day prepare an oven tray with a rack on top of it. Remove some marinade from the chicken. Put the chicken breast on the rack and take it to the oven. The oven must be preheated to 375ºF. You should cook the chicken for about 45 minutes. Turn the chicken once so that the cooking is uniform. You can add more marinade.
And then the chicken will be ready. Serve it hot. You can serve it with a salad. Tomato, onion, lettuce, something simple. Enjoy!

Sunday, April 21, 2013

TEMPEH CURRY


A different curry for today. A vegetarian curry with Tempeh. Perfect for vegetarians and meat eaters. Why not! There are many kinds in the market. A very good option. Let’s get started!

Ingredients:

½ green pepper
½ red onion
1 tablespoon chopped garlic
1 tablespoon chopped fresh ginger
1 sweet potato
1 packet of tempeh
Some vegetable oil
2 oz pure creamed coconut
1 teaspoon soy sauce
½ teaspoon turmeric
½ teaspoon cumin
½ teaspoon coriander
1 teaspoon dried basil
Some freshly ground black pepper, to taste
Some salt, if needed

First, prepare the vegetables. Cut the pepper and the onion in little pieces. Chop the garlic and the ginger. Cut the sweet potato in pieces too.
The next thing is to do the same with the tempeh. Cube it carefully so that it does not break too much.
Next, put some vegetable oil in a pan and heat it. When it is hot, sauté the vegetables: sweet potatoes, onions and green pepper. Add the garlic and the ginger two minutes later.
In the meantime, prepare the coconut. Take the piece of pure creamed coconut and grate it with the help of a knife. Then add the grated coconut to a cup of hot water. Mix till you get the coconut melted with the hot water.
Coming back to the pan, it is the moment to add the tempeh. Cook for a couple of minutes and then add the coconut. Add the soy sauce, the spices and the herbs now. Lower the fire and let it cook for ten minutes. See if you need to add more salt.
Then you will have your dish ready. Serve it with some rice. Basmati is good. Enjoy!

Wednesday, April 10, 2013

PORRUSALDA


Cod and leeks. Those are the main ingredients of this delicious recipe from Spain. A wonderful soup. Let’s start cooking.

Ingredients:

2 pieces of salt cod
3 leeks
2 potatoes, peeled and cut in pieces
4 cups vegetable broth or water
1 teaspoon parsley
1 teaspoon pimentón
1 clove of garlic, sliced
Some freshly ground black pepper, to taste
Some salt, if needed
Some extra virgin olive oil

The first thing we have to for this recipe is preparing the cod. You have to soak it in water for at least 24 hours, changing the water every three hours.
You will have to prepare the vegetables. Clean the leeks properly, making sure you get rid of all the dirt that they can have. Wash them well. Once the leeks are washed, cut them in pieces.
Start cooking putting the pieces of potato in a pan with the water or broth. At the same time, sauté the leeks in another pan using hot oil but on a low fire. Three minutes later, add the cod, that you will have broken up into small shreds previously. Add the black pepper and taste it to see if some salt is needed. Let it cook for three more minutes.
Now add the potatoes and their liquid (water or broth) to the pan with the leeks and the cod.
To finish the dish, sauté the slices of garlic in another pan with some drops of hot oil, adding the pimentón at the last moment when you remove the pan from the fire. Once you have done this, add the garlic to the main pan and serve. Enjoy!

Thursday, March 7, 2013

VATAPÁ


A delicious seafood dish from Brazil. One with Portuguese and African influence in the Brazilian cuisine. Let’s cook.

Ingredients:

1 cup dried tiny shrimp (They are really small shrimp. You can get them in Asian stores or in good supermarkets. They have a very strong flavor. If you cannot get them, you can make your Vatapá without them. With the dried shrimp you will get a strong Vatapá; without them, a lighter one)
½ chopped onion
1 cayenne chili pepper, chopped (with the seeds if you want a hot Vatapá, and without seeds if you want something lighter)
1 clove of garlic, chopped
½ teaspoon pimentón
Some extra virgin olive oil
2 tablespoons grated coconut
1 cup coconut milk
1 cup crushed tomato
3 tablespoons bread crumbs
2 tablespoons peanut butter
15 big shrimp, peeled
1 desalted cod filet, chopped
Some cilantro, dried or fresh
Some salt to taste
Some freshly ground black pepper, to taste

You should start soaking the dried shrimp in hot water. Soak them for about 20 minutes. Then rinse them well and chop them. Reserve them.
Heat some oil in a pan. Not too much, just a couple of tablespoons. Then, when it is hot, sauté the onion. Add the chili pepper and the garlic one minute later. Add the pimentón, but be careful so that it does not get burned. Next add the dried shrimp. Then add the grated coconut, the coconut milk and the tomato. Bring to a boil. Lower the heat and let it simmer for about ten minutes.
In the meantime, using another pan, sauté the shrimp in some hot oil, just one tablespoon of oil.
Once the shrimp are done, reserve them and sauté the cod in the same way. Just a couple of minutes.
Now we will add the bread crumbs and the peanut butter to the pan. Mix well and keep on simmering it.
Finally, add the shrimp and the cod to the pan. Mix well and let it simmer for a couple of minutes. Add salt and pepper to taste. The last touch is adding the cilantro. If you have it fresth, the better. It can be served with cooked rice.
A delicious recipe, different but really good. Cook it! Enjoy!

HOLLOW POTATOES


A different recipe. Potatoes in an interesting approach. Popular in some parts of Spain, but not everywhere. Now you can cook them. Let’s cook.

Ingredients:

2 potatoes
2 eggs
3 tablespoons flour
1 bay leaf
Some salt to taste
Some freshly ground black pepper, to taste
½ teaspoon baking powder
½ teaspoon turmeric
Some extra virgin oilve oil

To start, wash and peel the potatoes. Cut them in pieces. Then boil them in water with a bit of salt the bay leaf. Once the potatoes are done, rinse them in cold water. Remove the bay leaf. Mix the potatoes with the eggs. Add the flour and mash everything well. Add the baking powder and some salt and black pepper. I like to add some turmeric. Just to add a bit of colour. We must get a mixture to make like a sort of croquettes later.
If it is needed, you can add more flour, but do it little by little anyway. When you have the mixture, let it rest for 15 minutes.
Then, with the help of a wooden spoon, shape the potato croquettes. Heat some oil in a pan and when it is hot, fry the Hollow Potatoes. Some minutes on one side, some minutes on the other side.
If you want, you can add some herbs to the mixture, but do not overuse herbs. Serve hot. You can serve them as a tapa or as a side. They are different and delicious. Enjoy!

Thursday, February 14, 2013

POMFRET RACHEADO


More fish for today. And a recipe from India, from Goa. Delicious. Very easy to make, too. Let’s get started.

Ingredients:

2 pomfrets
3 tablespoons Racheado masala
Some salt to taste
Some flour
Some drops of extra virgin olive oil
2 papadums

To start with our recipe you will have to prepare the fish. Pomfrets are easy to clean. Remove the insides of the pomfrets. The fins and the tail too. You can leave the head if you want.
Once the pomfrets are clean, make some cuts on the sides.
The next thing is using that wonderful masala. Racheado masala. You can find it easily in Asian stores. Put the masala inside the pomfrets and through the cuts you made to the sides.
And now to the grill. Heat the grill and drop some extra virgin olive oil. Cook the pomfrets for some minutes. Both sides. Make sure they are not overcooked.
You can serve them with pappadums. To prepare the pappadums first you have to heat a pan. When it is really hot, put a pappadum and let it cook. You have to be careful. Be alert so that the papadum does not get burned. When you see the papadum is changing colour, turn it and cook it for some seconds on the other side. Remove it from the pan and let it cool. Repeat the procedure with the other papadum.
And now you will have everything ready to serve. Serve one pomfret per person along with one papadum. Good fish. Enjoy!